If you want to earn that elusive 5-beer "Perfect Shift" rating and rake in the gold, you need to know exactly where to spend your hard-earned cash. The best bar upgrades Busy Bar World Tour offers aren't always the flashy ones—they are the subtle efficiency boosters that save you precious seconds during a rush. Flarewing Studios has built a notoriously tight management loop where a single dirty glass or a slow pour can tank your shift rating. In this comprehensive guide, we break down the priority equipment and decor you need to maximize your shift profits, handle ridiculous guests, and eventually buy out rival moguls.

The Core Economy of Busy Bar - World Tour
Before dropping your starting gold on a vintage jukebox, you have to understand how the game calculates success. Every shift is a chaotic sprint against the clock. Your performance is graded on a scale of 1 to 5 beers. Hitting 4 beers nets you the "Solid Shift" bonus, but the real money is locked behind the 5-beer "Perfect Shift."
Achieving this consistently requires a ruthless approach to your upgrade tree. Gold is the lifeblood of your empire. You need it to unlock new venues, buy out rivals, and eventually hit the coveted "Rolling in Gold" achievement (earning 15,000 gold lifetime). Early on, players often make the mistake of buying decor to make their bar look cool. Stop doing this. Aesthetics do not pour drinks. Throughput pours drinks. Your first 50 shifts should be laser-focused on mechanical automation and workflow optimization.
Tier 1: The Best Bar Upgrades Busy Bar World Tour Has for Shift Efficiency
The early game is all about survival. When the doors open and the first wave of patrons floods in, your base equipment simply cannot keep up. These three upgrades are non-negotiable if you want to survive the first few hours of the campaign.
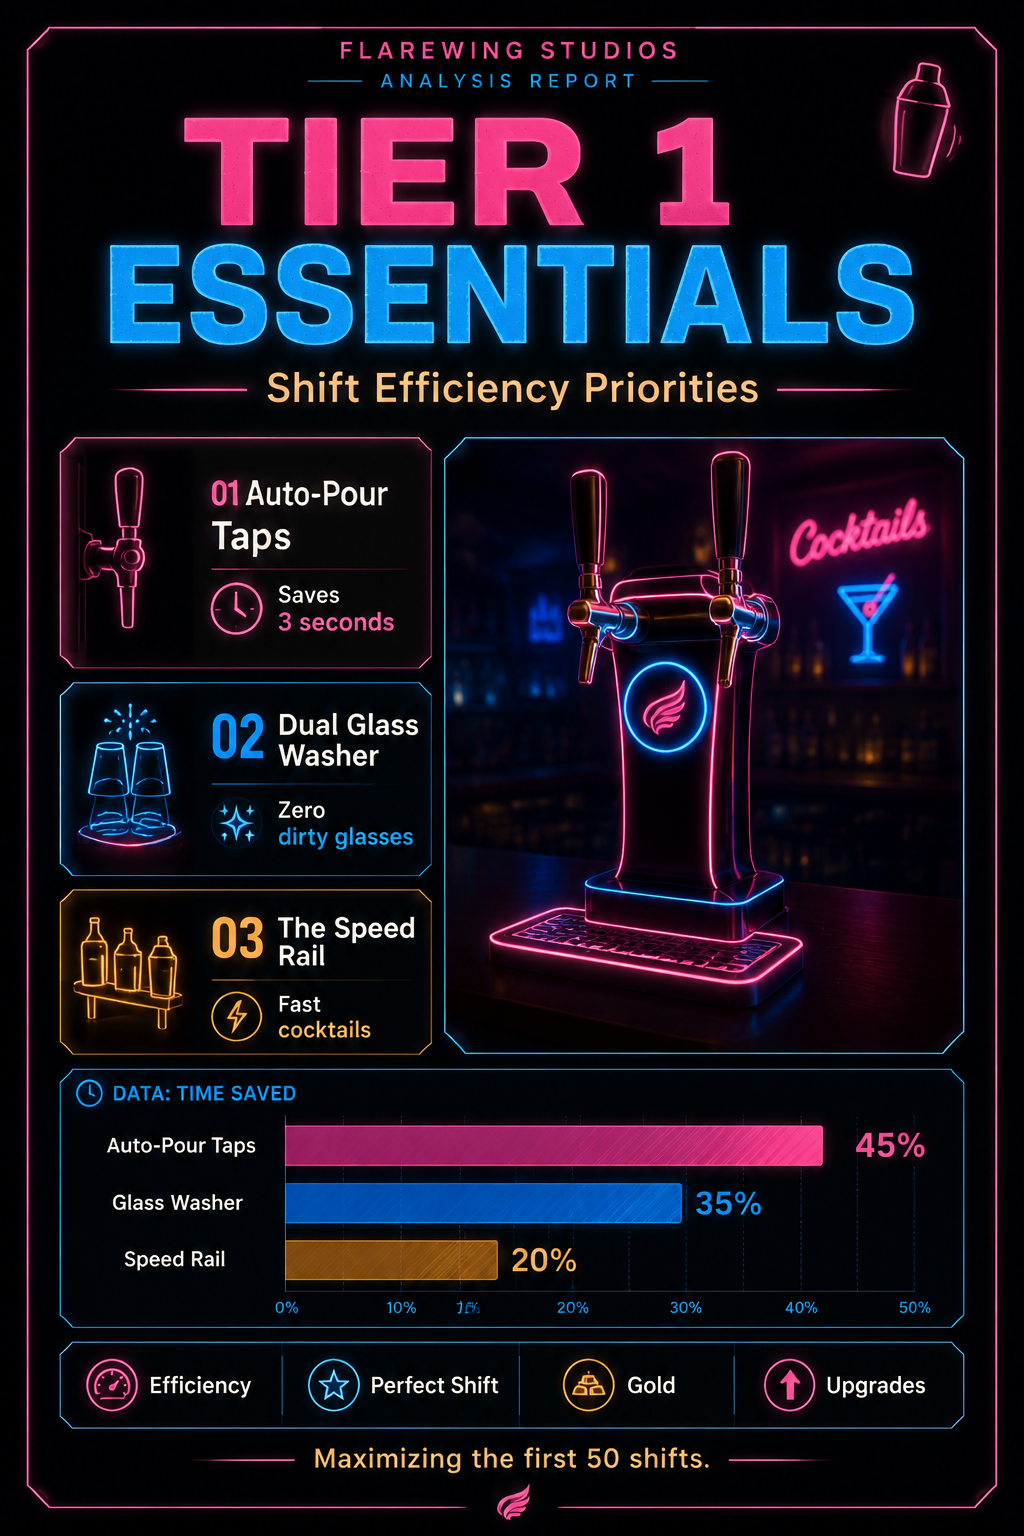
1. The Auto-Pour Taps If you buy nothing else, buy the Auto-Pour Taps. In the base game, manually holding the tap for every pint eats up valuable frames. The Auto-Pour upgrade allows you to start a beer, walk away to mix a cocktail, and come back to a perfectly poured pint without it overflowing. It effectively acts as a second pair of hands, shaving roughly 3 seconds off every standard drink order. When "The College Frat" guest type arrives and spams cheap beer orders, this upgrade is the only thing standing between you and a failed shift.
2. The Dual Glass Washer You cannot serve drinks in dirty glasses. The starter sink is agonizingly slow, requiring you to scrub each glass individually. The Dual Glass Washer doubles your washing capacity and automates the scrubbing cycle. In co-op mode, this is arguably more important than the Auto-Pour Taps, as throughput—not multitasking—becomes the primary bottleneck for two players.
3. The Speed Rail Cocktails are where the high profit margins live, but they are also massive time sinks. The Speed Rail upgrade organizes your most commonly used liquors right at waist height, skipping the animation of turning around to the back bar. It cuts cocktail prep time by 20%, which is mandatory when "The Critic" shows up demanding flawless, complex mixology.
Tier 2: The Best Bar Upgrades Busy Bar World Tour Offers for Profit Multipliers
Once your workflow is automated and you are consistently hitting 4-beer "Solid Shifts," it is time to pivot your strategy. Efficiency gets you through the rush, but multipliers get you rich. This is where decor actually starts to matter mechanically.
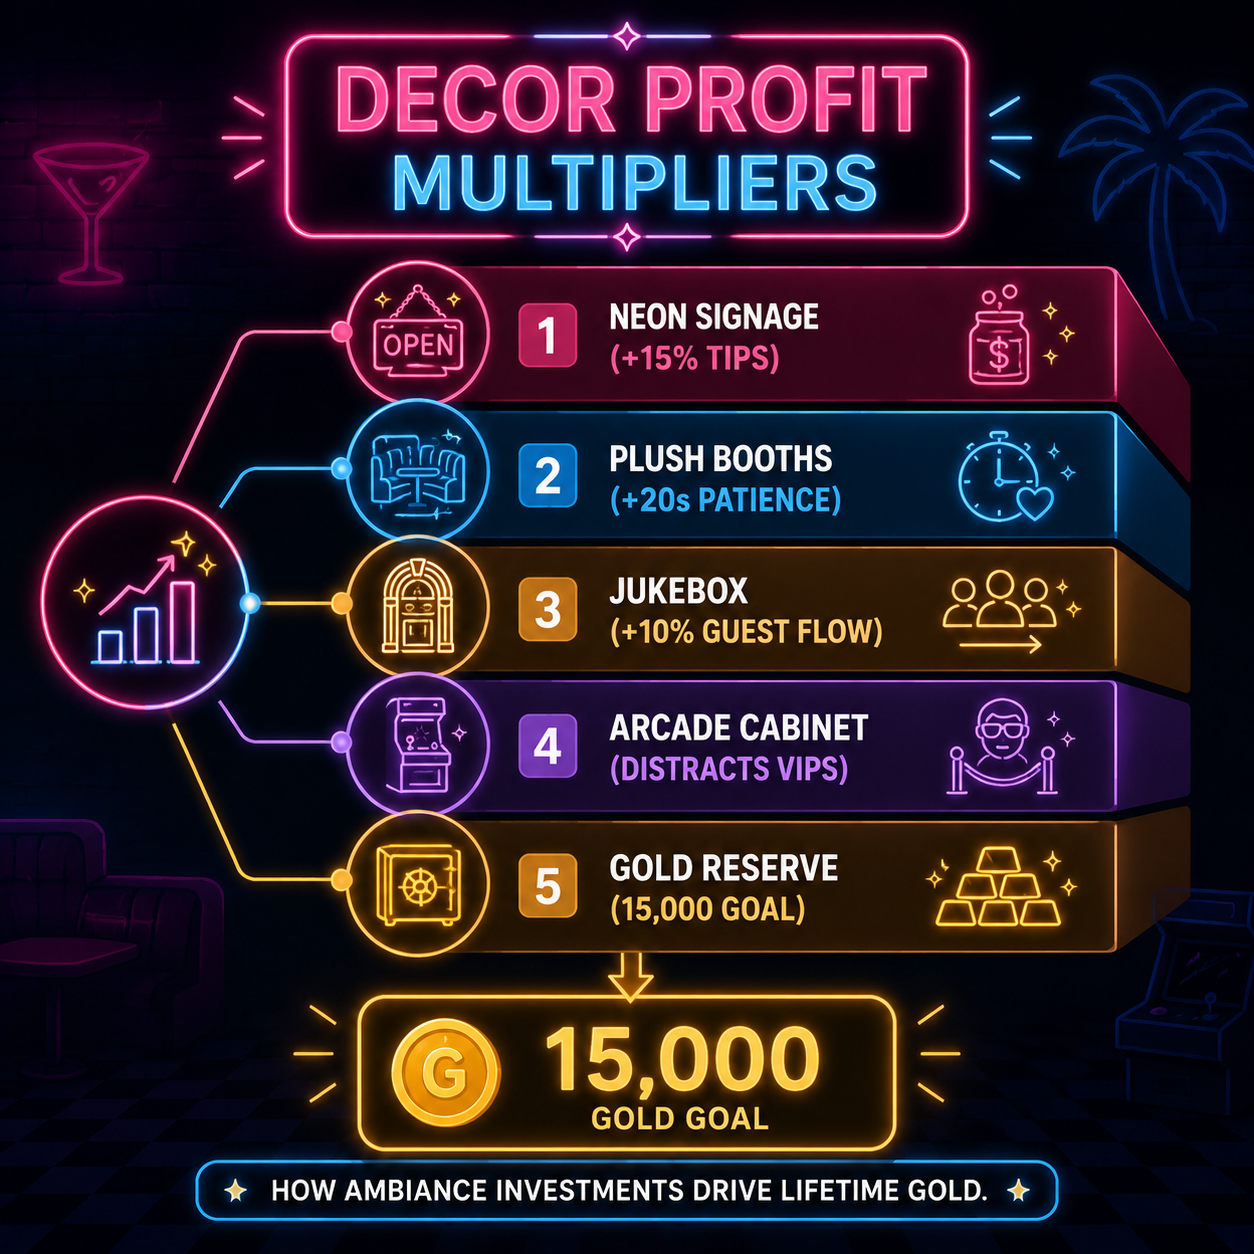
1. Neon Signage Don't let the visual flair fool you; Neon Signage is a pure stat stick. Placing high-tier neon signs near your entrance applies a passive +15% tip multiplier to every guest who walks through the door. It is an expensive upfront investment, but it pays for itself within five to ten shifts depending on your volume.
2. Plush Booths Guest patience is a hidden timer that dictates how much they tip—and whether they storm out entirely. "The Bachelorette Party" is a notorious guest type that orders 4 to 6 complex drinks at once but has incredibly low patience. Upgrading your seating to Plush Booths adds a flat +20 seconds to the patience timer of anyone sitting in them. It provides a massive buffer during peak rush hours, allowing you to prioritize quick orders at the bar while the booths wait comfortably.
3. Upgraded POS System It sounds boring, but the Upgraded POS System is a silent carry. It reduces the transaction animation time and auto-calculates change. Over a 250-shift career, the seconds saved by faster checkouts compound into thousands of extra gold.
Optimal Bar Layouts: Synergizing Your Equipment
Buying the best gear is only half the battle; where you put it dictates your actual throughput. Busy Bar - World Tour features a grid-based placement system, and poor pathing will ruin your Perfect Shift attempts.
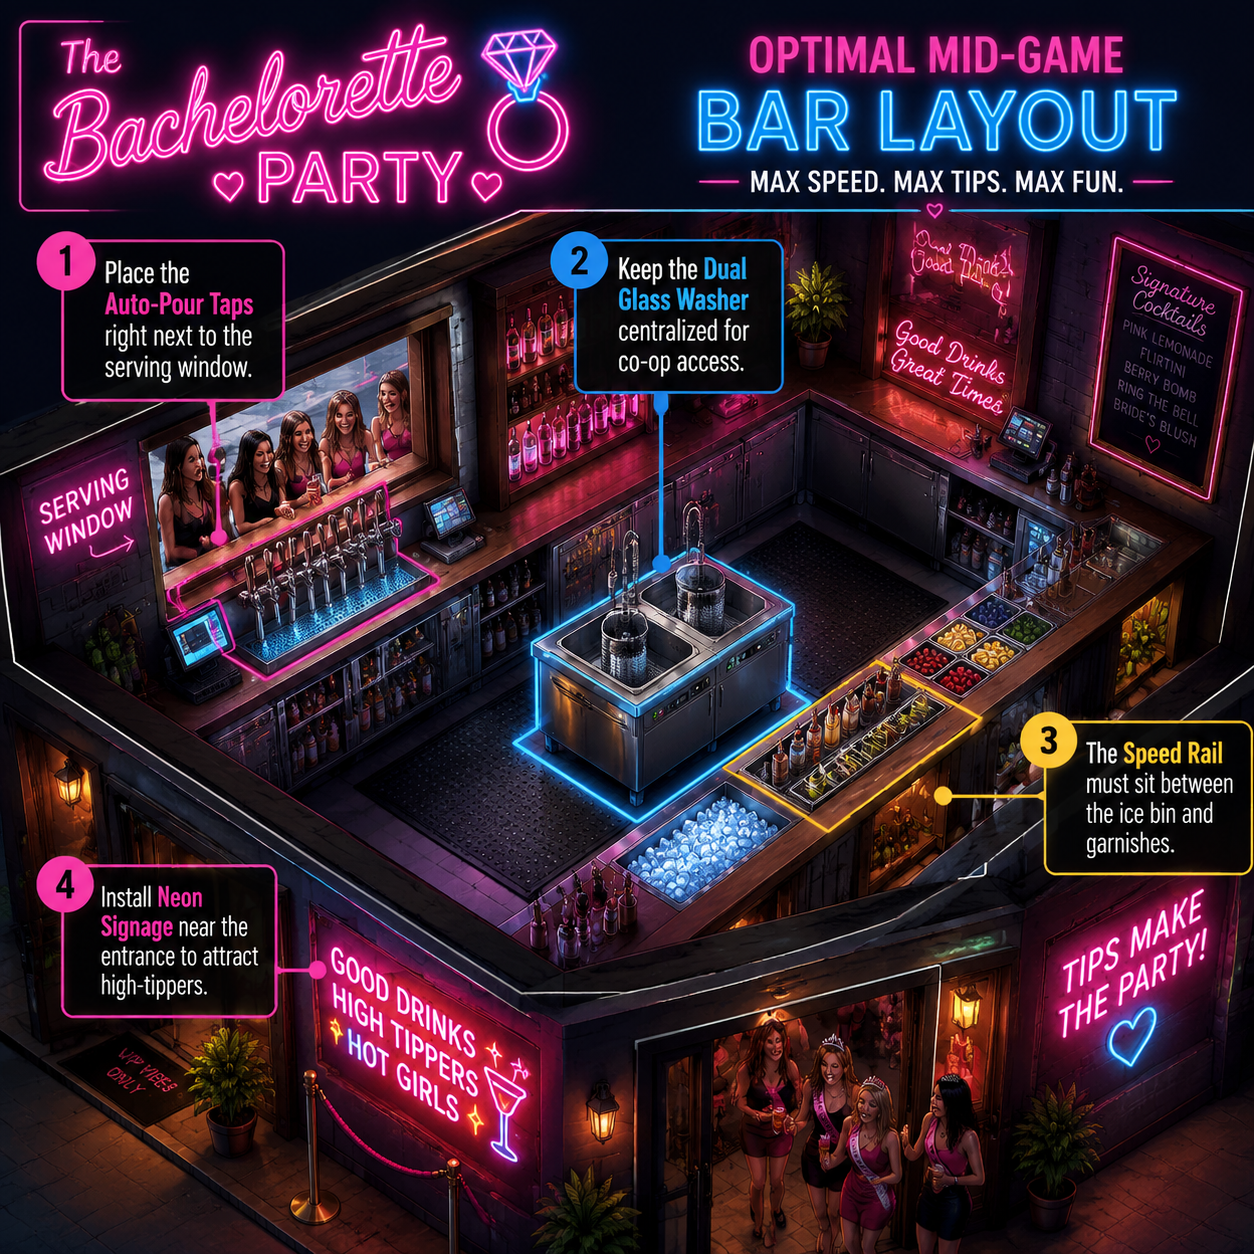
Positioning matters immensely. You want to create a "golden triangle" of movement behind the bar. Place the Auto-Pour Taps right next to the serving window so you can hand off beers the millisecond they finish pouring. The Speed Rail must sit directly between the Premium Ice Machine and your garnishes. If you have to take more than two steps to complete a Mojito, your layout is wrong.
For co-op players, centralization is key. Keep the Dual Glass Washer in the exact center of the back bar so both players can dump dirty glasses without crossing paths and colliding. Collisions cause dropped items, and dropped items destroy your shift multiplier.
Solo vs. Co-Op: Diverging Upgrade Paths
The meta shifts dramatically depending on your player count. What works for a solo mogul will actively hinder a co-op duo.
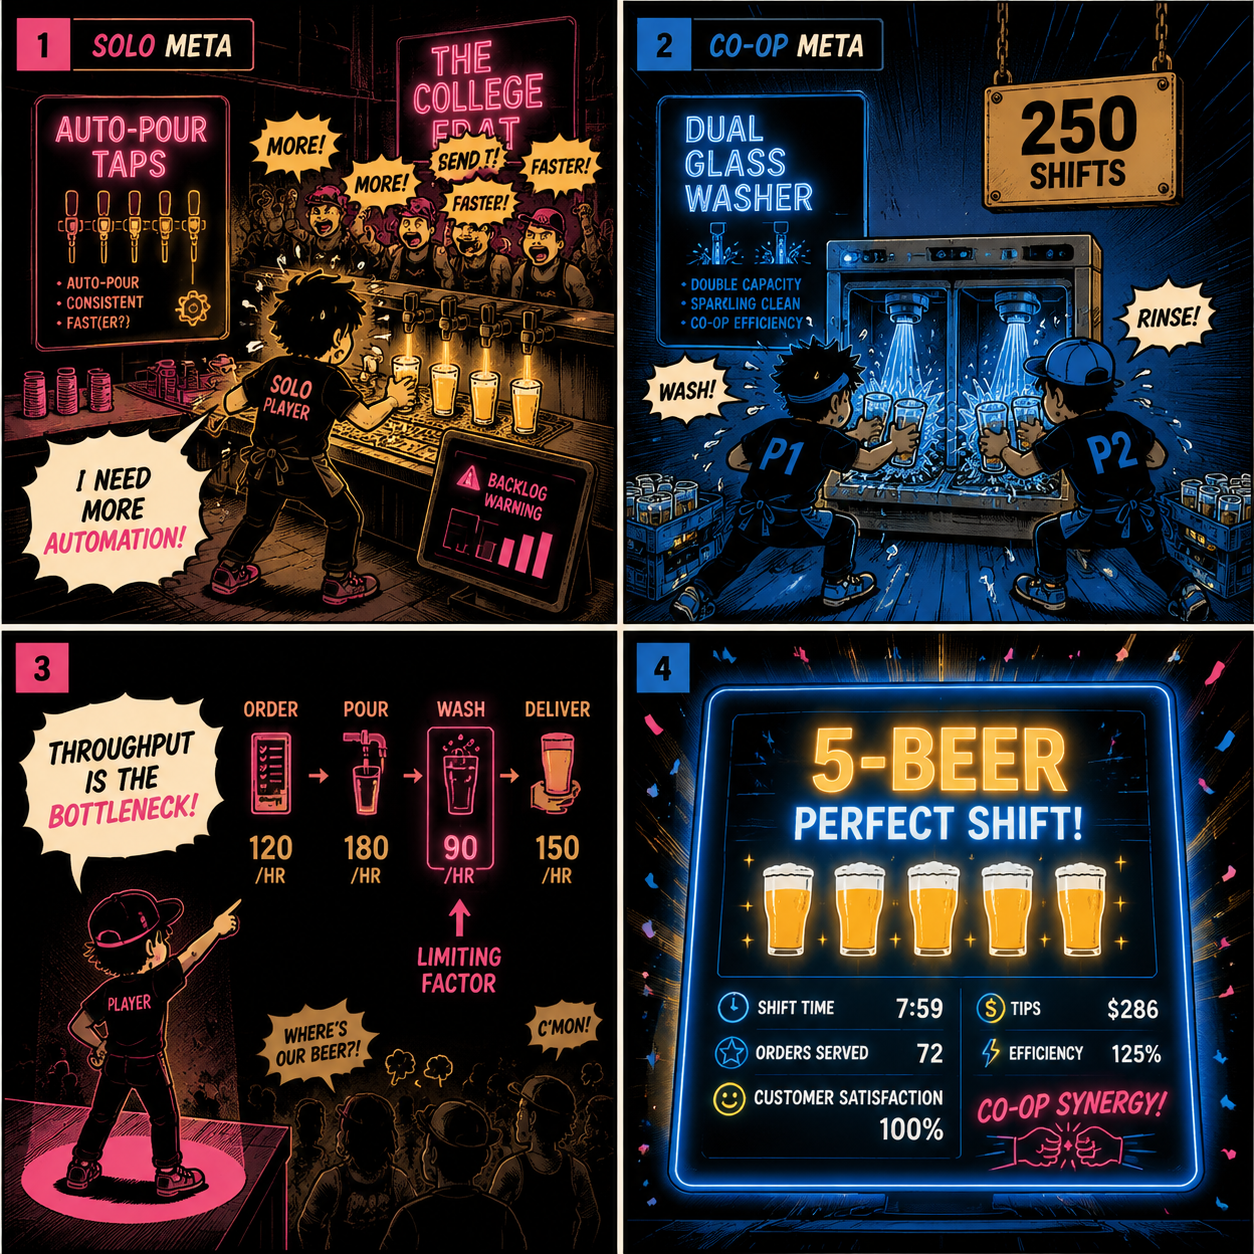
In solo play, you are fighting a war of attrition against your own attention span. Automation is your only defense. You must rush the Auto-Pour Taps and the Auto-Ice Dispenser. Your goal is to turn the game into a rhythm puzzle where you are simply moving between automated stations.
In co-op, you already have the ultimate automation: a second human being. Throughput is the bottleneck. You don't need Auto-Pour Taps as desperately because one player can dedicate themselves entirely to the taps. Instead, co-op teams should rush the Dual Glass Washer and double up on POS Systems so both players can check out guests simultaneously.
Endgame: The Best Bar Upgrades Busy Bar World Tour Meta for Rival Moguls
Once you have upgraded a bar to the maximum level (triggering the "Every corner is finished" achievement), the campaign shifts from a management sim to a hostile takeover game. You will face off against rival moguls who control different districts of the city.
Defeating Baron Von Brew, the tycoon who controls the European pub district, requires raw volume. He doesn't care about fancy cocktails; his shifts generate massive revenue through sheer beer sales. To beat his revenue targets, your endgame meta must focus entirely on capacity. You need the Quad-Pour Taps, the Keg Room Expansion (so you never have to stop to change kegs), and maximum seating capacity.
Conversely, taking down Magnus "The Mixologist" Sterling requires a completely different loadout. Magnus dominates the high-end cocktail lounges. Beating him requires maximizing the tip multiplier on every single drink. This means investing heavily in the Premium Jukebox, the VIP Velvet Ropes, and the Master Mixology Kit.
Ultimately, hitting that 15,000 gold lifetime achievement isn't just about grinding 250 shifts—it's about adapting your upgrades to the specific rival you are trying to bankrupt.
FAQ
What is the fastest way to get a 5-beer Perfect Shift? Prioritize the Auto-Pour Taps and the Upgraded POS System. The most common reason players drop to 4 beers is guests timing out while waiting to pay. Faster checkouts keep the line moving and the patience timers high.
Do decor upgrades actually do anything? Yes. Unlike some simulators where decor is purely cosmetic, in Busy Bar - World Tour, decor items are stat sticks. Neon signs increase tips, plush seating increases patience, and arcade cabinets distract waiting guests, pausing their anger meters.
Should I upgrade my starter bar fully or save for a new venue? Get your starter bar to level 3 (unlocking the Speed Rail and Dual Glass Washer), then save your gold to buy out your first rival. Fully maxing out the starter bar early is a trap that delays your mid-game progression.
Does the "Rolling in Gold" achievement require 15,000 gold in the bank? No. The 15,000 gold is a lifetime earned metric. You are free to spend your gold on upgrades without resetting your progress toward the achievement.
Sources
- Flarewing Studios Official Pre-Release Patch Notes
- SteamDB Achievement Trackers for Busy Bar - World Tour
- Community Theorycrafting and Pre-Release Gameplay Demos