The punishing soulslike combat of CLYDE Games’ newly released Early Access hit demands perfection, but even the most perfectly timed dodge rolls won't save you from a screen full of magical chaos. If you want to survive the brutal boss encounters of the Unknown Lands and protect your hard-earned Astral Tears, finding the best wards Cursemark has to offer is non-negotiable.
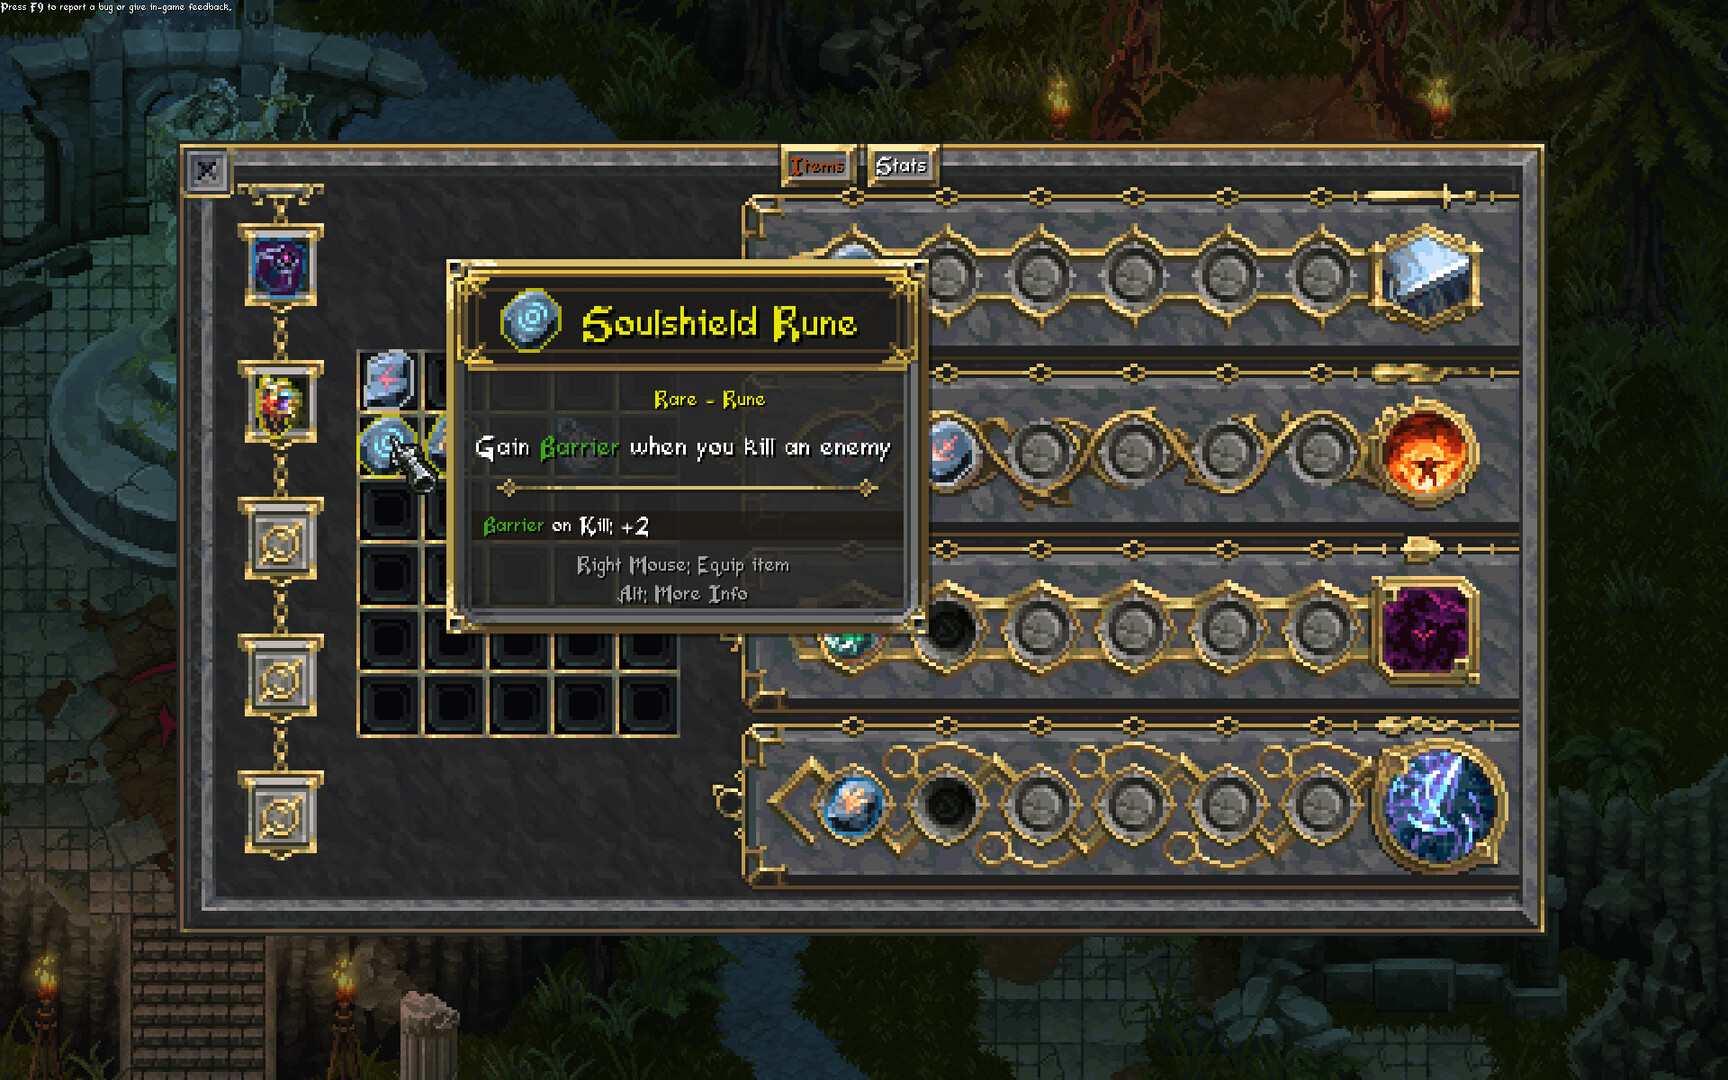
Unlike traditional soulslikes where a shield is just a passive slab of metal you hold up to block physical damage, Cursemark turns defense into a highly lethal, customizable weapon. Bound to your 'E' key, wards are dynamic, elemental barriers that can be augmented with the game's deep runic system. A perfectly timed ward doesn't just block an incoming sword strike; it shatters enemies, inflicts rot, or triggers devastating chain lightning across the boss arena.

With seven distinct schools of magic to choose from—Celestial, Divine, Umbral, Draconic, Lightning, Ice, and Rot—the build variety is staggering. But not all defenses are created equal. Some wards are highly situational and require hyper-specific loadouts to function, while others flat-out break the game's difficulty curve and trivialize the early biomes. Here is the definitive tier list and location guide for the top defensive magic in the current Early Access build.
Why Your 'E' Key is Your Lifeline
Before diving into the rankings, it is crucial to understand how the combat loop in Cursemark prioritizes active defense over passive tanking. You have four primary actions: your left-click basic melee attack, your right-click ranged spell, your Q-key ultimate ability, and your E-key defensive ward.
Because the cursemark mechanic actively tightens and raises enemy difficulty with every room you clear, you cannot afford to take chip damage. Healing at shrines is expensive, and health drops are virtually nonexistent during boss fights. Your ward is the only reliable way to mitigate damage without burning through your limited resources. Furthermore, wards serve as combo-enablers. A successful block often staggers smaller mobs, opening them up for a critical melee execution that restores a fraction of your stamina. If you are ignoring your E-key, you are playing the game wrong.
S-Tier: The Best Wards Cursemark Has to Offer
The upper echelon of defensive magic provides significantly more than just basic damage mitigation. These elite wards offer invulnerability frames (i-frames), massive area-of-effect (AoE) crowd control, or unparalleled health sustain.
Umbral Shroud (Umbral Magic) The Umbral Shroud is currently the undisputed king of the Early Access meta. Activating this ward envelops your nameless mage-knight in abyssal shadows, granting a generous 1.5-second window of pure invulnerability. In a game where bosses routinely unleash relentless, screen-filling bullet-hell mechanics, those i-frames are the difference between a triumphant clear and a frustrating trip back to the hub camp.
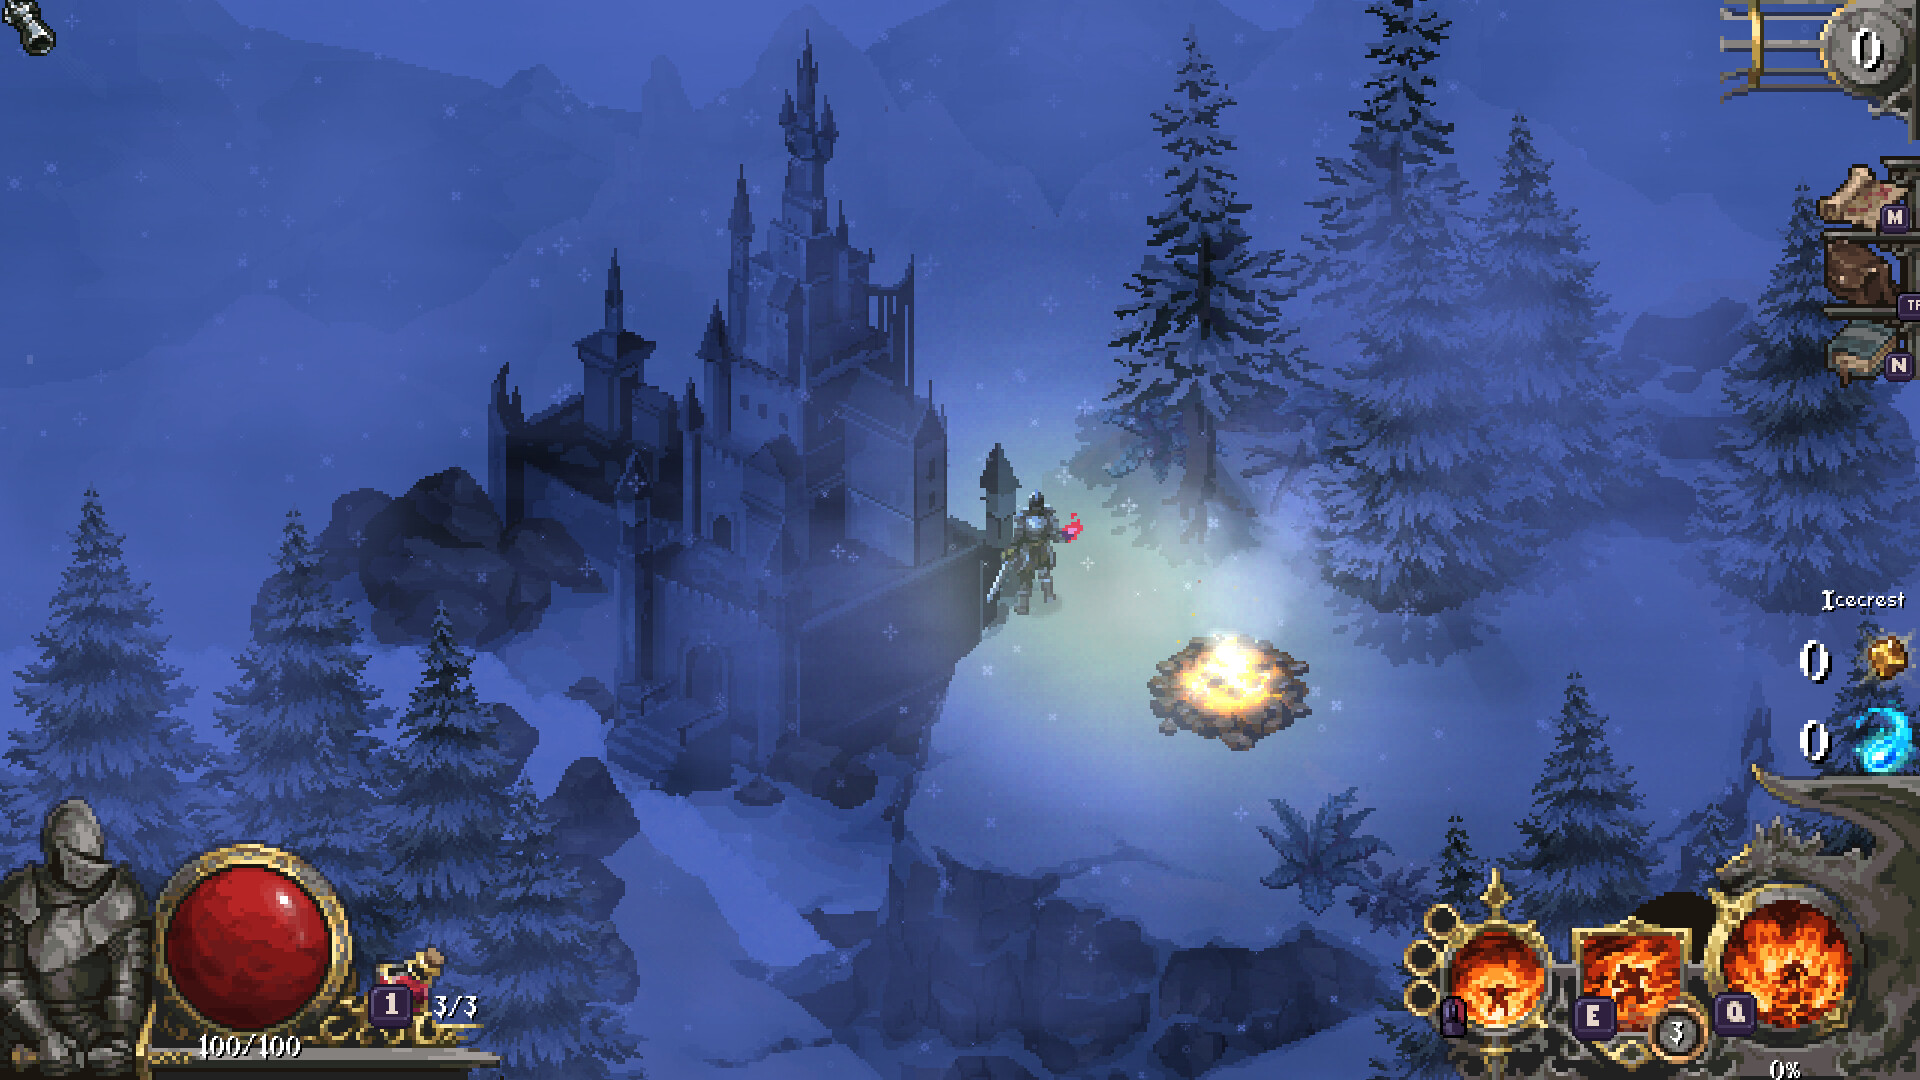
Furthermore, the Umbral Shroud features a base 40% damage reflection stat. If you time the activation right as an enemy lands a heavy blow, nearly half of that damage is reflected straight back into their health bar. Location: You will find the Umbral Shroud hidden deep within the Veil of Death biome. It drops exclusively from the elite Shadow-Knight miniboss patrolling the eastern courtyard.
Celestial Bulwark (Celestial Magic) If you prefer a build centered around sustain and long-term survivability, the Celestial Bulwark is mandatory. While it lacks the sheer invincibility of the Umbral Shroud, it converts 20% of all blocked damage directly into health. When pushing through high-density mob rooms where the cursemark tightens and enemy aggression spikes, the Celestial Bulwark allows you to literally out-heal the incoming chip damage. It is the ultimate war-of-attrition tool. Location: Located at the Shrine of Life. You must solve the environmental bridge puzzle to unlock the hidden reliquary containing this ward.
Divine Aegis (Divine Magic) The Divine Aegis is the premier face-tanking tool for players who refuse to back down. It deploys a massive, static dome of golden light that protects not just you, but any deployable summons or runic turrets you have active on the field. It boasts the highest base poise damage in the game; any standard enemy that strikes the dome is instantly staggered. Location: Awarded automatically after defeating the first major story boss in the Ashford Lowlands.
A-Tier and B-Tier: Highly Situational Defenses
Not every ward can be an S-tier game-breaker. The following wards are incredibly potent but require specific rune synergies or highly specialized playstyles to truly shine.
Glacial Barricade (Ice Magic - A-Tier) The Glacial Barricade is a staple among players running the popular "Ice God" build. When struck by a melee attack, this ward erupts outward, applying a deep freeze to all enemies within a five-meter radius. The downside? It has a punishingly long 12-second base cooldown, meaning you cannot rely on it for sustained, repetitive defense. It is a combo-starter, not a panic button.
Draconic Ward (Fire Magic - A-Tier) Offense is sometimes the best defense. The Draconic Ward acts much more like a high-stakes parry than a traditional shield. Time it perfectly with an incoming strike, and it unleashes a devastating cone of dragon fire that melts unarmored foes. Miss the tight parry window, however, and you absorb the full brunt of the attack with zero mitigation. Location: Hidden behind the notoriously cryptic Western Door that leads to the magma biome.
Rot Carapace (Poison Magic - B-Tier) The Rot Carapace surrounds you with a toxic cloud that deals percentage-based damage over time to adjacent foes. While the damage scaling is excellent against late-game bosses with massive health pools, the visual clutter of the green poison cloud makes it incredibly difficult to read incoming enemy attack animations, leading to unnecessary deaths. Location: Found in the forestry river/swamp area, heavily guarded by the Rot-Priest.
How to Find the Best Wards Cursemark Early Game
Because Cursemark features a static, handcrafted map rather than procedurally generated biomes, pathfinding is a crucial element of your build. You can absolutely sequence-break the early game to secure overpowered gear if you know exactly where to look.
When you first awaken in the Unknown Lands, the game subtly funnels you toward the center of the Ashford Lowlands. Resist the urge to grind the opening tiles. Instead, hug the eastern wall of the map to bypass the primary mob encampments and make a direct sprint for the Shrine of Life. The enemies here will easily one-shot you at level one, so rely purely on your space-bar dodge roll to avoid drawing aggro.

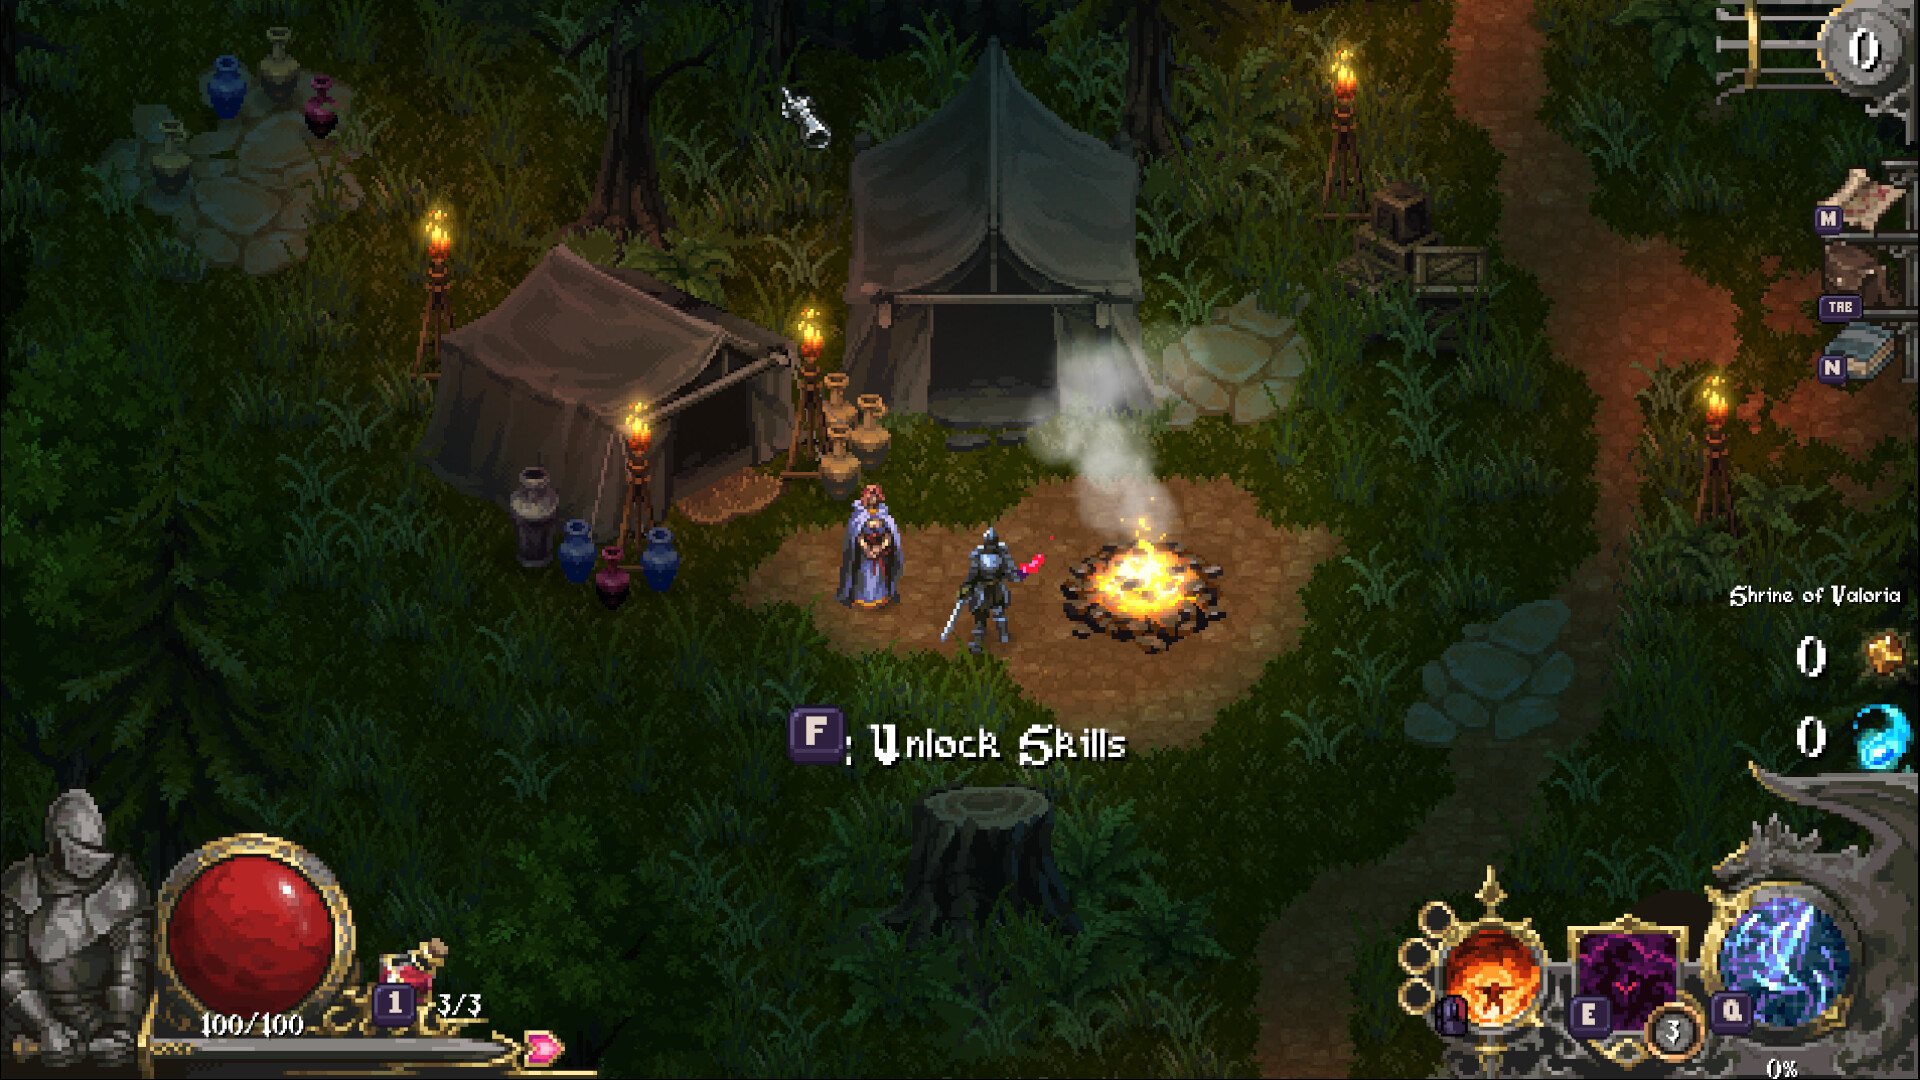
Once at the Shrine of Life, look for the stone bridge lined with decorative skulls. A nearby lore tablet hints at the solution: you must run back and forth across the bridge three times without stopping. Doing so unlocks the hidden door containing the Celestial Bulwark. Securing this S-tier ward within the first twenty minutes of a fresh save completely trivializes the first two biomes, allowing you to hoard your Astral Tears for permanent meta-progression upgrades rather than wasting them on early healing items.
If you are aiming for the Umbral Shroud, you will need to progress naturally through the Ashford Lowlands to unlock the Veil of Death shortcut. Do not attempt the Veil of Death without upgrading your primary melee weapon at the forge; the Shadow-Knight who guards the Umbral Shroud has a massive health pool and will outlast a weak player in a war of attrition.
The Meta-Progression of Wards: Astral Tears
Unlocking a ward is only the first step. Cursemark is an action roguelite, meaning death is inevitable and serves as a core progression mechanic. When you die, you lose your current run's equipped runes and temporary buffs, but you retain your Astral Tears—the game's premium meta-progression currency.
Back at the hub camp, you can spend Astral Tears to permanently upgrade the base stats of your unlocked wards. Upgrading the Draconic Ward, for instance, widens its unforgiving parry window by a few crucial milliseconds. Upgrading the Celestial Bulwark increases its damage-to-health conversion rate from 20% to 25%. If you find yourself consistently dying to the same boss, stop bashing your head against the wall and spend a few runs purely farming Astral Tears to permanently buff your E-key ability.
Ranking the Best Wards Cursemark Build Synergies
Optimizing your defense through the game's runic system is where the combat truly opens up. Runes can be slotted into your attacks, spells, wards, and ultimates to drastically alter their behavior. A ward that feels sluggish or underpowered can be completely transformed by a single, well-placed rune.
The Lightning-Rod Shroud Slotting a Chain Lightning rune into the Umbral Shroud creates the most mathematically dominant defensive ability in the current patch. Because the Umbral Shroud grants 1.5 seconds of invulnerability, you can intentionally walk into multi-hit environmental hazards or boss AoE attacks. Every single "hit" you absorb during those i-frames triggers the Chain Lightning rune, filling the screen with retaliatory electric arcs that melt surrounding mobs without you ever swinging your sword.
The Shatter-Step Barricade Combine the Glacial Barricade with a Mobility rune. Normally, the Glacial Barricade roots you in place while casting, making you a sitting duck once the ice shatters. The Mobility rune overrides this animation lock, allowing you to dash forward while the ice shield is active. You effectively become a freezing battering ram, freezing enemies on contact and setting them up for a heavy sword strike shatter.
The Rotting Aegis Placing a Rot rune into the Divine Aegis dome turns a purely defensive bunker into a lethal gas chamber. Enemies that step inside the dome to attack you are simultaneously staggered by the Aegis's high poise damage and melted by the localized poison cloud. This synergy is particularly effective in the cramped, narrow corridors of the forestry swamp area where enemies cannot easily flank your position.
Experimentation is the core loop of the Unknown Lands. Always prioritize spending your Astral Tears on unlocking new rune slots for your E-key ability before upgrading your basic attack damage.
FAQ: Mastering Defense in the Unknown Lands
What is the best ward in Cursemark? Based on Early Access Patch 1.0, the Umbral Shroud is the best overall ward due to its 1.5-second invulnerability window and 40% damage reflection. For pure healing and sustain, the Celestial Bulwark is the top choice.
How do you unlock new wards? Wards are found by exploring the static, handcrafted map of the Unknown Lands. They are typically hidden behind environmental puzzles (like the Shrine of Life bridge), locked behind cryptic barriers (like the Western Door), or dropped by specific elite minibosses.
Does the ward cooldown reset on room clear? No. Ward cooldowns persist between rooms. If you burn your ward to survive the final enemy in a tile, you will enter the next tile with your E-key ability still on cooldown. Always manage your defensive economy carefully, especially when the cursemark difficulty is high.
How do I open the Western Door to get the Draconic Ward? The Western Door, which leads to the magma area, requires the player to ignite three hidden braziers in the Ashford Lowlands using any Fire-element spell or a sword augmented with a fire rune. Once all three are lit, the door permanently unlocks for all future runs.
Sources
- CLYDE Games Official Steam Early Access Patch Notes (June 2026)
- Cursemark Community Discord Build Compendiums
- Mad Mushroom Publisher Launch Guides