To prevent starvation cascades in NEED: No End, you must continuously manually shuffle your limited workers between the Wheat Field, Quarry, Mill, and Bakery, ensuring a constant output of bread before expanding your population. If you fail to balance this delicate production chain, your bread supply hits zero, the screen flashes red, and your settlement instantly falls.
If you are desperately searching for how to manage hunger NEED No End, you have likely already seen that dreaded red screen. Popcorn Forge’s sideways-scrolling village management game is built entirely around pressure. It does not hold your hand, and it does not offer a grace period. The realm shifts between heavy, shadowed moments and brief, fragile warmth, but the timer never stops ticking. Every decision you make is ultimately in service to one goal: keeping the bread flowing.
Unlike traditional city-builders where a food shortage simply slows down growth or causes a temporary debuff, NEED: No End treats hunger as an immediate, binary fail state. There is no "starving" status effect that gives you three days to fix your farms. When your bread icon drops to zero, the UI flashes violently, the darkness consumes your village, and your run is over. This deep-dive strategy breakdown will show you exactly how to stabilize your early game, build resilient production loops, and prevent the starvation cascades that wipe out unprepared settlements.
The Red Screen of Death: Why Bread is Everything
Visually, NEED: No End is remarkably dark at points, which leads to some spectacular sunsets that banish the darkness for a while. But that darkness is not just atmospheric—it is a mechanical threat. The game asks for calm focus in moments of chaos, and fast thinking when hesitation becomes a mistake.
The central pillar of that focus is the bread stockpile. Every worker in your settlement passively consumes bread. If the supply line falters for even a minute, the deficit compounds. Because the game relies on tightly woven, multi-layered automation systems, a failure at the start of the chain (like running out of stone for the mill) won't show up as a food shortage until it's already too late to fix it. You will see your workers standing idle, a "Missing stacks" warning hovering over their heads, and by the time you realize the flour production has halted, the bread timer will hit zero.
To survive, you cannot simply build farms and forget about them. You must treat your village as a living, breathing machine where labor is your most precious and scarce resource. You have to scroll left and right constantly, monitoring the precise input and output of every node in the food network.
The Core Rule of How to Manage Hunger NEED No End
The fundamental challenge of the game is that you never have enough workers to staff every building simultaneously. If you try to run every production building at once, you will spread your labor too thin, and nothing will get finished.
To master how to manage hunger NEED No End, you must understand the exact sequence of the bread lifeline. The production chain is not a simple "farm to table" process. It requires six distinct nodes to function properly:
- Wheat Field: Produces Grain. Requires a worker.
- Quarry: Produces Stone. Requires a worker.
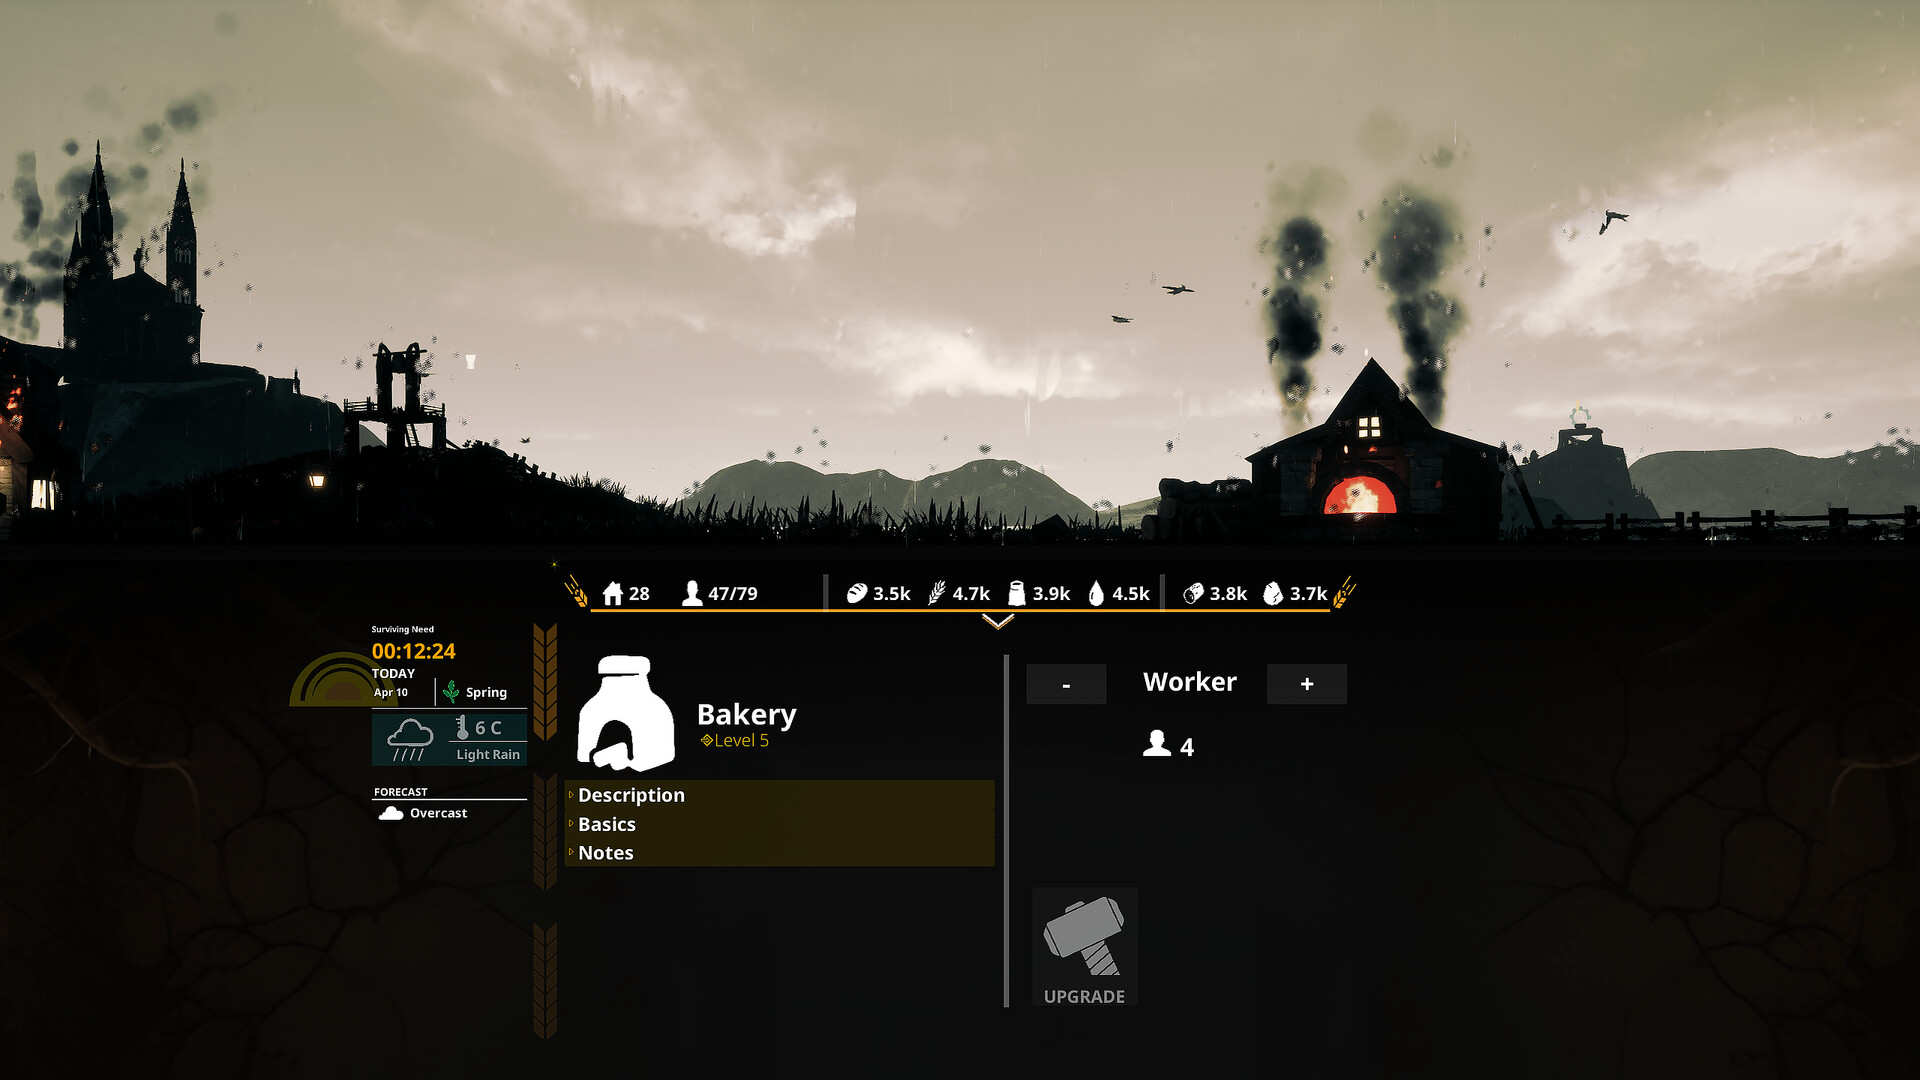
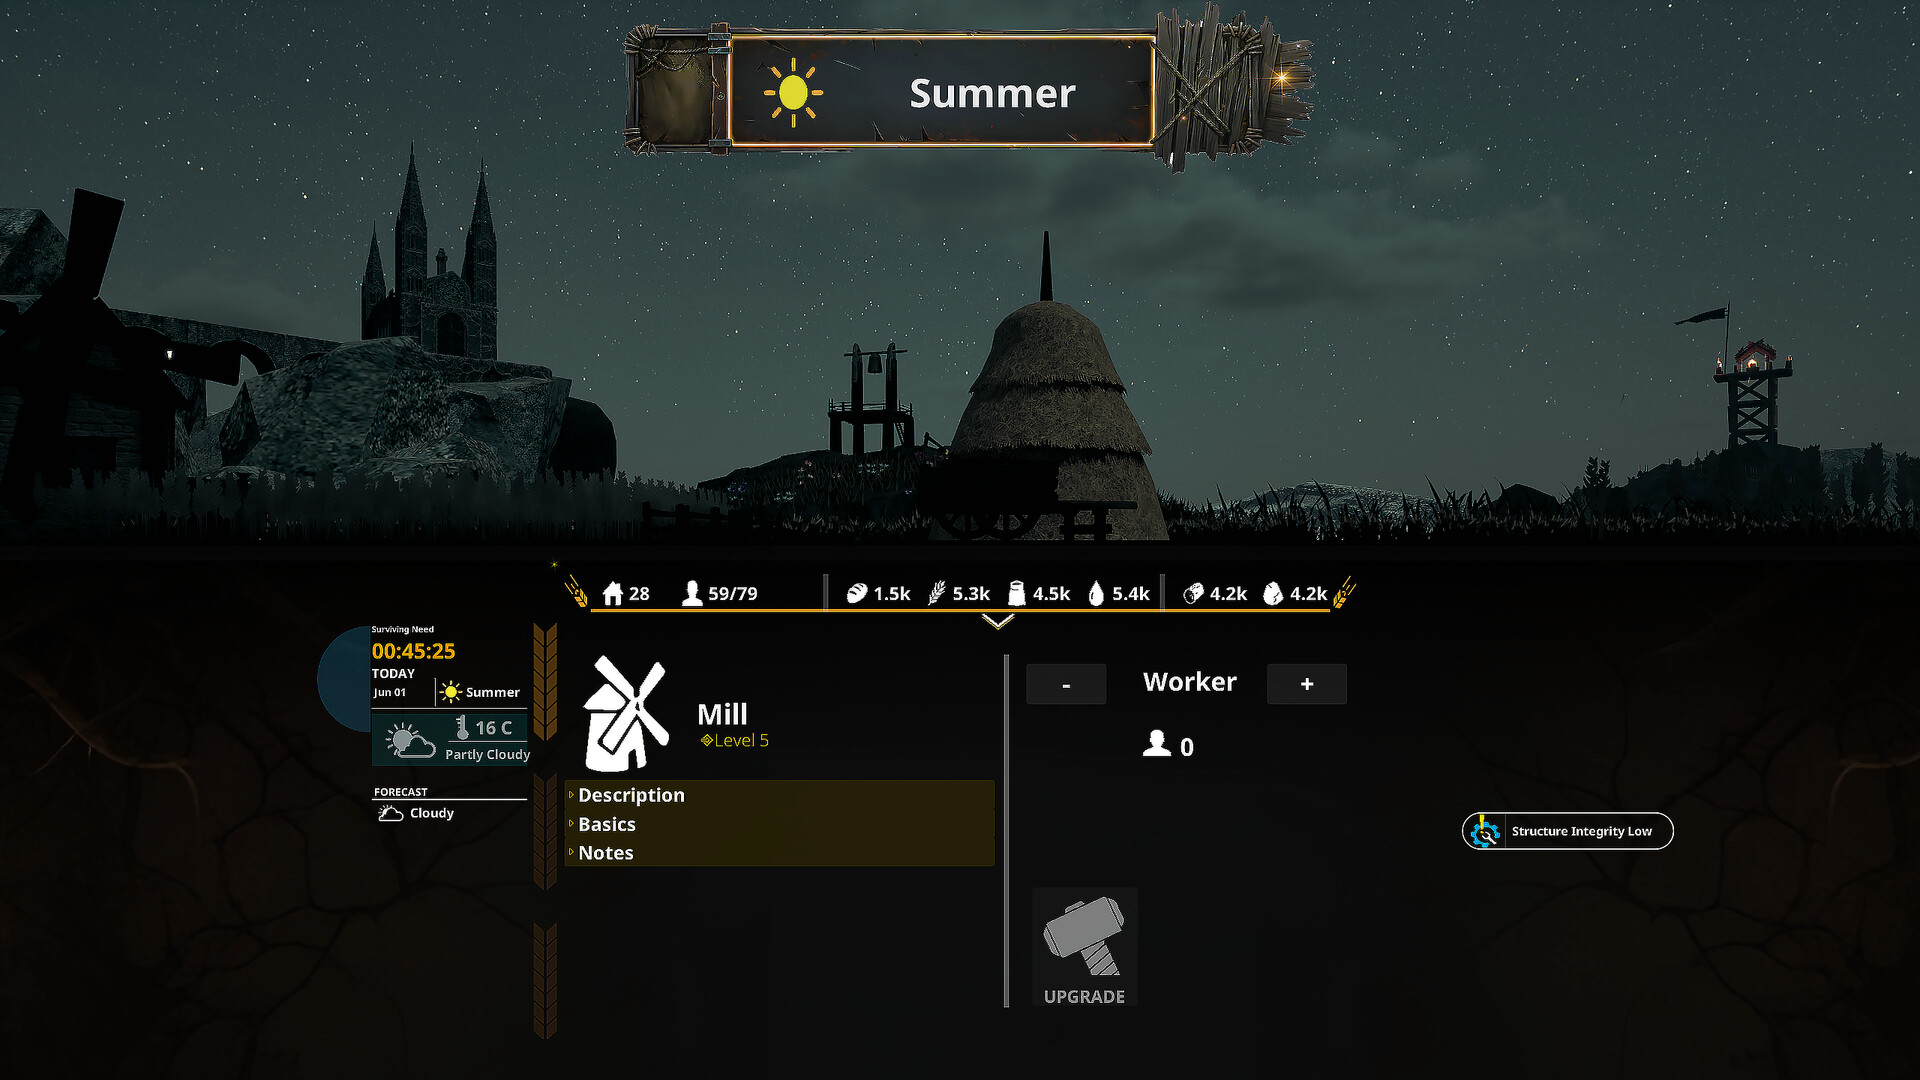
- Mill: Uses Stone to grind Grain into Flour. Requires a worker.
- Well: Produces Water. Requires a worker.
- Lumberjack: Produces Wood. Requires a worker.
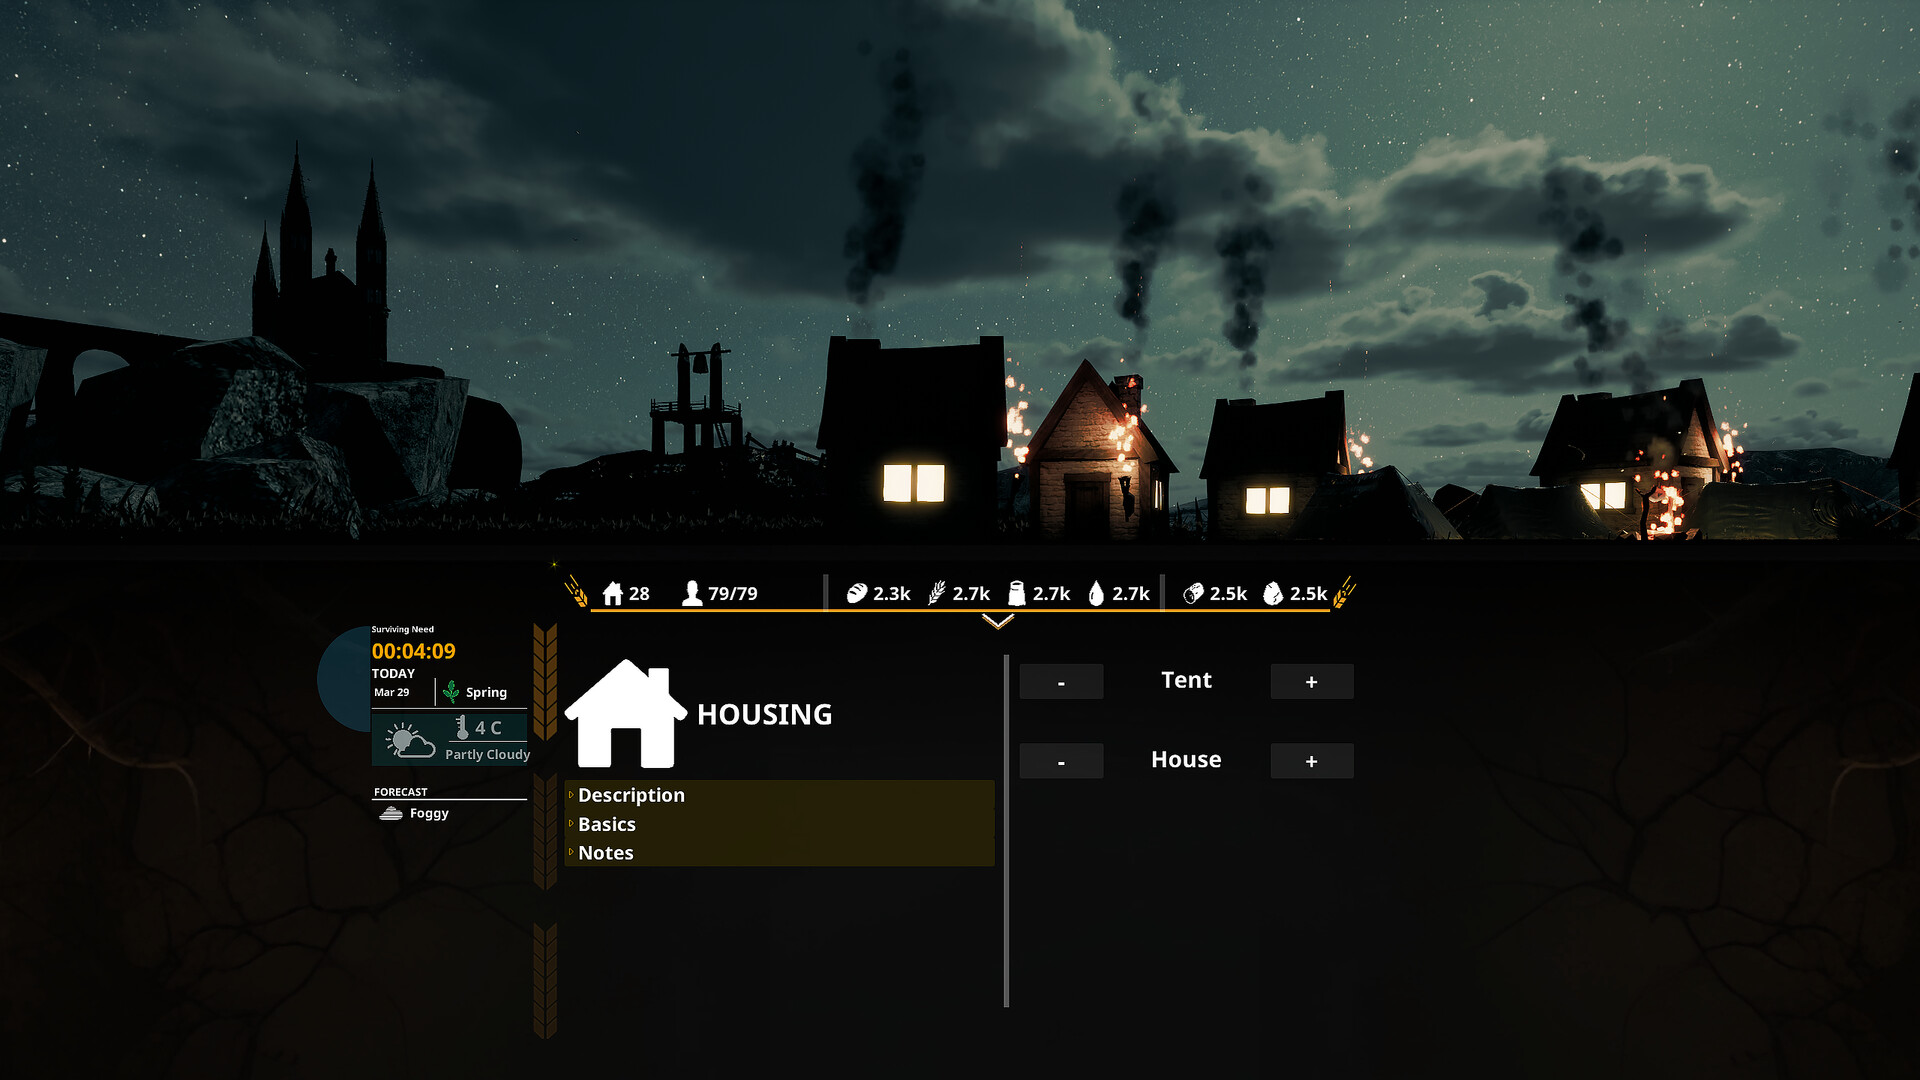
- Bakery: Combines Flour, Water, and Wood to bake Bread. (The exact UI ratio requires 10 Grain + 10 Wood = 2 Bread output once fully processed).
If any one of these nodes is unstaffed or missing its required input, the entire chain halts. The icon goes red, and the game over sequence begins.
Because you start with a severe labor deficit, you cannot assign a permanent worker to the Quarry, the Well, and the Mill all at once. You must operate in bursts, moving your limited workforce from one bottleneck to the next in a synchronized rhythm.
Early-Game Setup: How to Manage Hunger NEED No End Without Starving
Surviving the first few days requires absolute discipline. We call this the "Worker Shuffling Protocol." It is a method of managing the labor deficit by forcing your workers to act as a moving wave of productivity across your settlement.
Phase 1: The Grain Push At the start of the day, assign your available labor directly to the Wheat Field. You need to build up a massive stockpile of raw grain. Do not worry about baking yet. Let the little silhouettes work until the grain stacks are visibly piling up.
Phase 2: Stone & Mill Once you have a surplus of grain, pull your workers out of the Wheat Field. The Mill cannot turn that grain into flour without grinding stones. Initiate a Quarry rotation: send your workers to the Quarry to generate stone, then immediately move them to the Mill. They will now process the backlog of grain into flour.
Phase 3: The Baking Climax With a stockpile of flour ready, pull your workers from the Mill. Send one to the Well for water, and one to the Lumberjack for wood. Once you have the required materials, push everyone into the Bakery. They will rapidly combine the Flour + Water + Wood into a massive batch of bread, securing your survival for another cycle.
This rotation—Grain Push, Stone & Mill, The Baking Climax—must be repeated flawlessly. A single hesitation becomes a mistake. If you leave a worker in the Quarry too long, the Bakery will sit idle, and your settlement will fall. The ideal labor distribution in the early game hovers around 40% Food / 30% Resources / 30% Maintenance.
The Population Trap: Balancing Growth and Consumption
As you stabilize your production loops, you will inevitably want to expand. More workers mean less manual shuffling, right? This is the deadliest trap in NEED: No End.
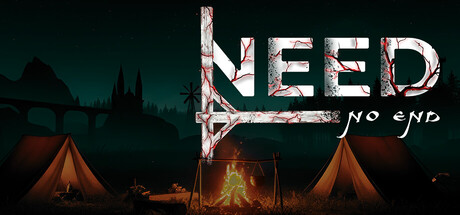
To get a new worker, you must build a house. The cost is steep: 3 Bread, 3 Logs, and 2 Stone. When the house is completed, a new worker arrives at the village border. You might think, "More mouths to feed, but more hands to work!" However, the math is brutally unforgiving.
A new worker increases your baseline bread consumption rate instantly. If you build two or three houses at once, your population spikes. Your un-upgraded Bakery, even if fully staffed, will not be able to process flour into bread fast enough to meet the new demand. The oven goes cold, the UI timer above it shows zero, and the settlement falls.
Never expand your housing until you have a massive, stable surplus of bread and the raw materials already stockpiled to keep the Bakery running non-stop. Growth must be incremental. Build one house, integrate the worker into the lumber or stone rotation to speed up the inputs, wait for the bread surplus to stabilize again, and only then consider building the next house.
Training Maesters: Advanced Strategies for How to Manage Hunger NEED No End
Eventually, manual worker shuffling becomes unsustainable. To transition into the mid-game and truly secure your settlement, you must train Maesters.
Maesters are specialized manager units that fundamentally alter how your buildings operate. A trained Maester pushes the structure beyond its normal limits, increasing efficiency, speed, and output without requiring additional raw workers. They are the key to automating your survival.
However, unlocking them is an enormous resource sink. To train a Maester, you must first build the required structure, which costs a staggering 100 bread, 50 wood, and 50 stone. Attempting to hoard 100 bread too early will cause your active workers to starve.
You must orchestrate a deliberate over-production phase. Dedicate an entire day/night cycle strictly to the "Baking Climax" phase of the worker shuffle. Pull everyone off non-essential tasks. Once you secure the 100 bread, immediately spend it to train the Maester, and assign them to the Bakery. A Maester-boosted Bakery is the only way to sustain a high-population settlement without the entire system collapsing under its own weight.
Defending Your Loaves: Raiders, Smugglers, and Decay
Managing your own workers is only half the battle. The darkness outside your village hides external threats that will actively try to dismantle your production chains.
Raiders and Smugglers Raiders approach from the dark edges to steal the bread supply. If they breach your defenses and reach your stockpile, they will carry off your hard-earned loaves. If your stockpile is low and a raider steals the last piece of bread, your counter hits zero and you instantly lose the game. You must build walls and assign defenders, treating your bread stockpile like a fortress vault. The Bakery must be placed centrally to minimize worker travel time and keep it far from the vulnerable edges of the map.
Structural Decay The game also features a relentless decay mechanic. Active structures wear down over time. You will periodically see a "Decaying structure" warning icon pop up over your vital buildings. Decaying structures require immediate wood and stone for repairs. If you ignore this warning, the building will eventually cease functioning. If your Mill or Bakery breaks down because you forgot to keep a reserve of stone and wood, the bread stops flowing, and the starvation cascade begins anew.
FAQ: Surviving the Darkness
Why is my screen flashing red? Your bread stockpile has hit zero. In NEED: No End, bread is your survival timer. If you run out, your settlement instantly falls and the run is over.
How do I fix the "Missing Stacks" warning? This means a building lacks the raw materials to function. If your Bakery shows this, it is missing Flour, Water, or Wood. Trace the production line backward—usually, the Mill has stopped because it lacks Stone from the Quarry.
What do Maesters actually do? Maesters act as managers that push a structure beyond its normal limits. Assigning a Maester to a building significantly boosts its production speed and efficiency, allowing you to scale your settlement without manually shuffling workers constantly.
Should I expand my population immediately? No. Every new house (which costs 3 Bread, 3 Logs, and 2 Stone) brings a new worker who constantly consumes food. Expanding too fast causes a starvation cascade where your Bakery cannot keep up with the new consumption rate.